Waxmoon
AggressivelargeOverview
Allow 4 seconds for a complete scan. Position yourself where the subject's movement path brings it toward you rather than chasing. Among Subnautica 2's hostile fauna, Waxmoon stands out for its relentless pursuit once aggression triggers. Escape requires either superior speed or smart use of environmental geometry. At 15 documented sites, Waxmoon ranks among the more commonly encountered organisms. Refer to the spawn map above to identify concentrations near your current operational area. Fauna encounters in Subnautica 2 follow ecological logic — predator and prey species distribute according to food web dynamics. The presence of Waxmoon in a region provides information about what else inhabits the area. Players who invest time scanning organisms like Waxmoon gradually build an intuitive understanding of Subnautica 2's ecology. This knowledge pays dividends through faster navigation, better resource prediction, and earlier threat detection in unfamiliar biomes.
Attacks & Abilities
Tips & Strategy
Waxmoon can deal up to 13.333 damage per hit. Keep your health above this threshold when exploring its territory, and carry a First Aid Kit as insurance.
To complete the 4-second scan on this hostile target, exploit moments when Waxmoon is attacking another creature or turning at the end of its patrol loop.
If you need to pass through Waxmoon's territory, time your crossing to coincide with its patrol taking it to the far side of its zone.
When exploring areas populated by Waxmoon, keep your Seaglide equipped and charged — the speed boost is often the difference between a clean escape and taking damage.
PDA Entry
Spawn Locations (15)
Subnautica 2 Gameplay
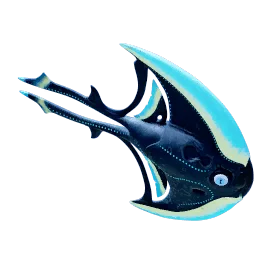
Waxmoon
aggressive creature- Attitude
- Aggressive
- Depth
- 0–350m
- Scan Time
- 4s
- Sight Range
- 9m